1) Install Steam
2) Purchase rFactor2 Steam Version
3) Install rFactor2 Steam Version
4) Launcher
5) Setup & Tuning
6) References
Welcome!
We are glad you have joined us to participate at one of the fastest growing stock car simulation websites with hosted racing, StockCarSimRacing.com.
Many of you have raced before with another stock car racing sim. Maybe it was rFactor, NASCAR 2003 Racing Season, iRacing.com, or possibly the rFactor2 non-Steam version. Because rFactor2 will be going Steam only in the next Build release, this write-up will concentrate on 1) getting those of you who have never run rFactor2 before up-and-running, and 2) getting those of you who are already running rFactor2 non-Steam into the Steam version.
This article is relevant to rFactor2 Build 1098. As a new build is released, this article will be updated. Build 1098 is available in non-Steam and Steam versions. We strongly advise you install the Steam version since it will be the final non-Steam version made available.
Install Steam
If you do not already have the Steam program, you can download the free program from http://steampowered.com.
Next, decide where you want it to install it. That is determined by your available hard drive space. Steam needs 1GB of free space. You can use the default installation for Steam, and it will load it into C:\Program Files\Steam\ but you may want to consider installing it in a different location on another drive that has more space (for example, D:\Steam\ or D:\Games\Steam\) and is not a Windows protected folder. I would suggest you install it in a non-protected Windows folder. Doing so can save some headaches later on with regards to permissions and accessing / installing files.
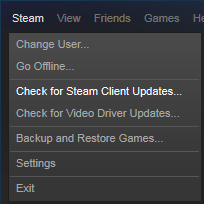
Before installing any game in Steam, it is wise to make sure your Steam installation is up-to-date. To do that, double-click the Steam shortcut icon on your desktop. In the upper left menu, click on "Steam" then "Check for Steam Client Updates".
Once it is done checking, close Steam, reboot, then check it again. Sometimes updates don't appear until the previous update is installed, and sometimes Steam doesn't find updates until it is restarted. Finicky, but it helps avoid other problems later on.
Get rFactor2 Steam Version
If you do not currently have rFactor2....
You can get rFactor2 Steam from steampowered.com and by doing a search for "rFactor2".
You will need to decide if you want the "Lifetime" version or the "Annual Multiplayer Renewal" version. Be sure and archive safely away your license information and any other documentation for future reference.
Install rFactor2 Steam Version
Now that you have the rFactor2 Steam license, you need to do one other thing – decide where you want to install it and where you have space to install it!
One big change from the non-Steam version is, Steam has special code flags to bypass the Windows permission restrictions on the exe files, something that non-Steam didn’t include. So presuming you have space on your C: hard drive, it’s not a problem to install to the default Steam folder.
That said, if you want to install it to the root of another drive you can, but it is not required or necessary.
Installing it to its own folder allows easier access to rFactor2 files without needing to navigate through the Steam program to get to your rFactor2 files. The procedure to change the path is explained here.
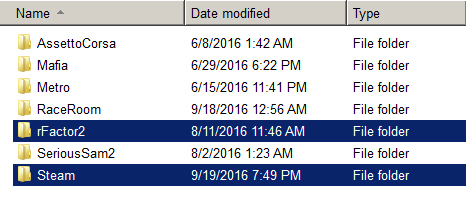
Here is an image of my current Steam games hard drive. Note I have Steam installed to D:\Steam and rF2 to D:\rFactor2.
If you want to do this and have a problem getting it accomplished, let one of the SCSR Admins know and we can meet on Teamspeak to walk through it. 
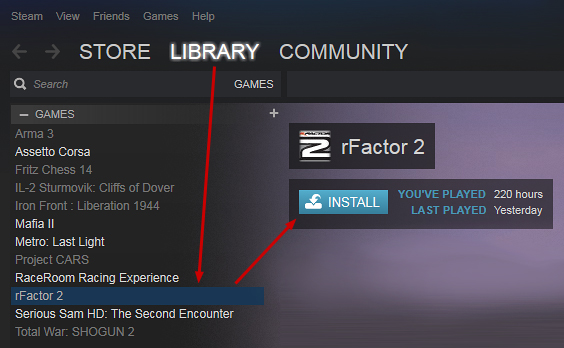
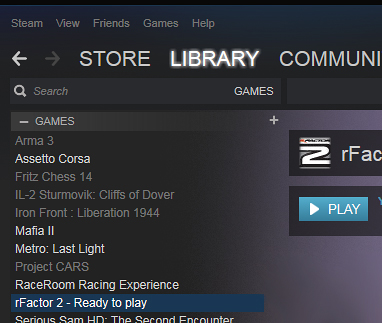
So now that you know you have the hard drive space and have decided to install it, just click the "Library" tab, then highlight "rFactor 2", then click the "Install" button.
Next you will see this screen. Be sure and click the dropdown menu if you change the installation from the default location. Also note you cannot create a new location path here. That has to be done as I explained earlier in the article.

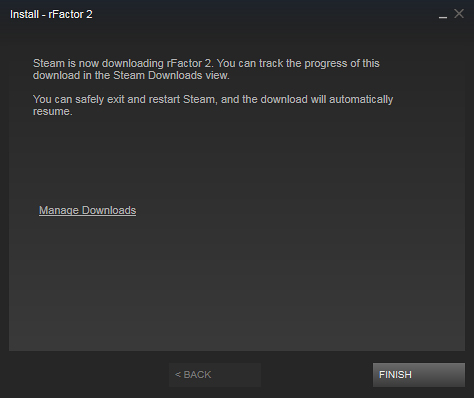
Next you'll see the legalese page, the license, then the downloads page. Click "Manage Downloads" to see the progress of the initial download. I say "initial" download because you're not done when this is completed. Notice the updated time to complete the download once you click on Manage Download.
How long does it take? I've heard some people say overnight. It takes me around 30 minutes. Somebody with a fiber optic Internet connection will be done in a couple of minutes.
Here's a tip. The night you download rF2 shouldn't be the night "she" decides to watch Netflix movies. A second tip. It also shouldn't be the night you surf the web, run a spreadsheet, play Duke Nukem, or whatever else. And another tip. Make sure everything else is closed while you're downloading. Let Steam hog all the bandwidth you got.
Whoohoo! Done downloading and ready to play! Wrong. It's a lie.
Notice the bar at the bottom in blue that is creeping across the bottom of your screen? That is the various cars and tracks that rFactor2 installs. It says downloading 1 item, but it is actually many items. Santa and the ice cream truck are in there along with all the nice oval tracks and the StockCars. Downloading all the cars and tracks can take as long as it did to install the base rFactor2 game. Let it complete and be patient a while longer.

Finally! 1 of 1 items completed! Now you can start it up! No, not yet. Close Steam and everything else you have running, and reboot your computer before running rFactor2 for the first time.
Now that is it rebooted and you're ready to start, I suggest you ALWAYS ALWAYS ALWAYS (got it?) click the Steam shortcut on your desktop then click the rFactor 2 listing on the left side of your Steam Library of games. Do not try to run Steam rFactor2 from a direct shortcut to rF2.
Launcher
Now that you have rFactor2 purchased and installed, take a few minutes to look around. When you click on the game shortcut, you’ll see this screen which is known as the launcher. In the top right you will see “Sign In” (and not my name). Click Sign In and you can change your rFactor2 name and nickname. Note this does not affect your Steam account, nor does it create a new rFactor2 player. It is strictly to change how your in-game name displays.
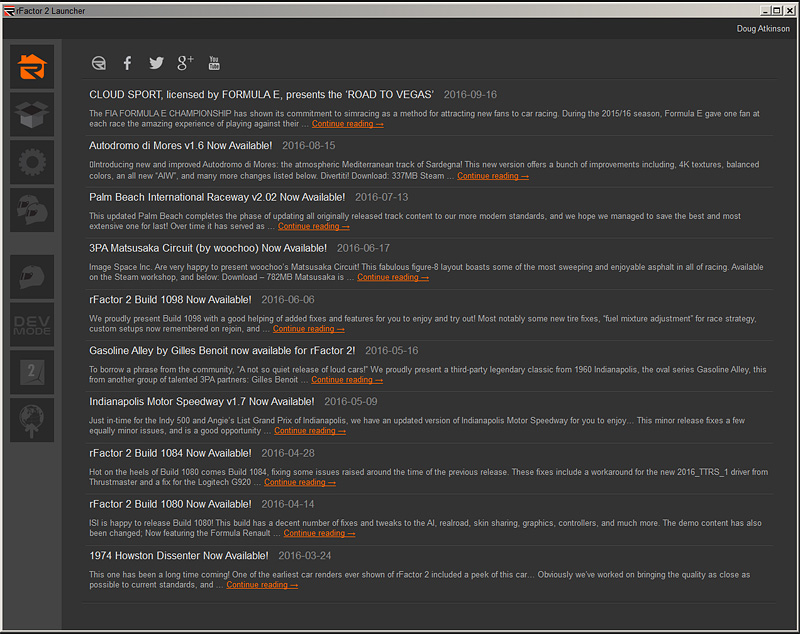
Lets briefly go through the various icons on the left side of the launcher. Most of it is self-explanatory and some of it you may never need, but here is a quick rundown from top to bottom.
- Launcher home icon.
- Packages icon. Click it and see all the stuff that was downloaded to your installation from that creeping blue line at the bottom of the screen.
- Settings icon. The gear has lots of stuff in it but the most important thing to do now is click on "Video Settings" and get that filled in.
- Multiplayer icon. Click this to connect to a server. There are a lot of servers listed so click on the column header "track" and find the server listing from that. You can save your favorite servers (StockCarSimRacing.com Wed, StockCarSimRacing.com Thur, StockCarSimRacing.com Fri). How to is listed in the FAQs. More on that later.
- Single Player icon. Offline racing.
- DevMode icon. Want to develop a car or track? This is where you build and test it. Save that till later in your rF2 life.
- MAS2 icon. When you want to create a racing event for online racing. Explaining that is beyond the scope of this article. Once again, ask me about and we can meet online in Teamspeak.
- Dedicated Server icon. When you want to create and host a multiplayer session online. You will need to open ports, and be proficient in MAS2. Another one to save till later in your rF2 life.
Setup & Tuning
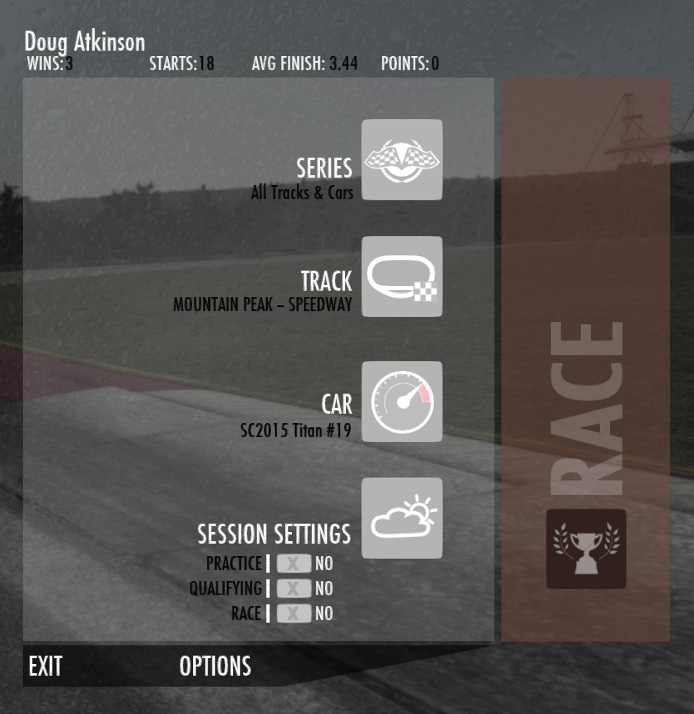
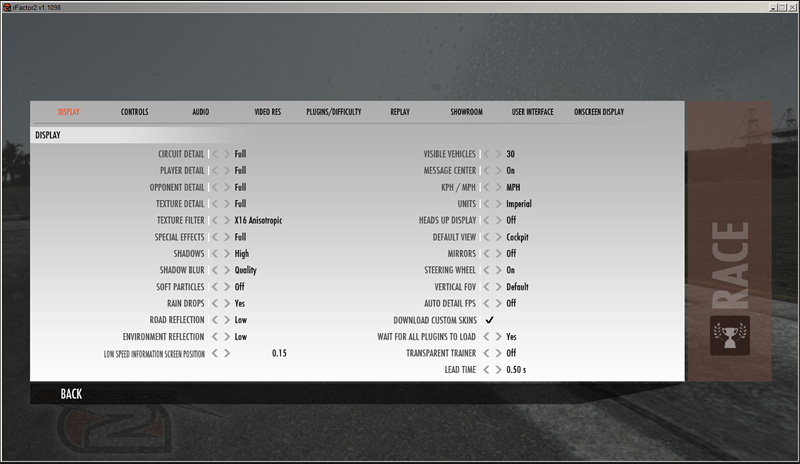
Click the Single Player or Multiplayer icons and you'll see this screen. Click the "Options" button in the bottom of the screen.
Lets go through a brief discussion of the options. Much of ths is exploration and experimentation for settings. You can try starting out with the graphics setting set to their limits high or low, then work from there. Se sure to set the "Video Res" settings. They are a bit different than the "Video Settings" you clicked on back in the Launcher. For "Controls", make sure your wheel and pedals are connected, then click on "Detect" in the lower right corner. ISI has done a good job of including many popular controllers. If it finds your controller, you can customize settings from there. A tip. Be sure and map the Starter and Ignition to buttons or keys on your keyboard. During a long pit stop when repairing a car, you need to turn off the engine or you'll burn it up sitting on pit lane doing repairs. Another tip. Look through the "Onscreen Display" options. One of them is made for StockCars. And another tip. Press the number 3 on your keyboard and it will toggle through the virtual mirrors. Point is, spend some time in here and go through the different settings. If you cna't find something, ask in the forum or send one of the SCSR Admins a message.
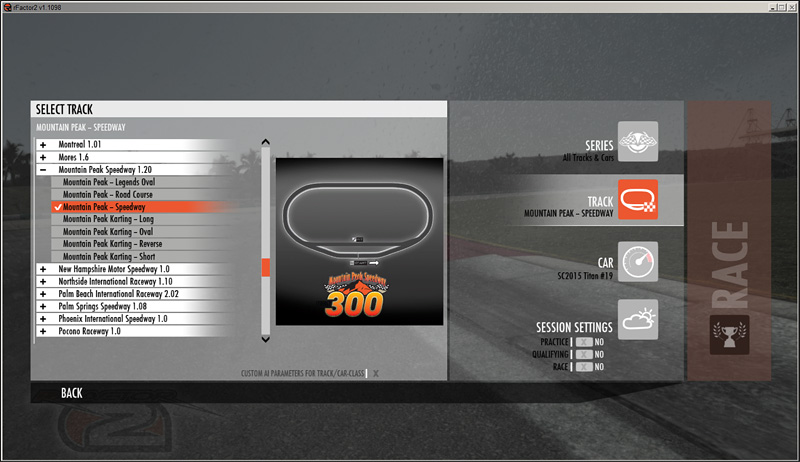
Now lets go back to the previous screen and click on the button, "Track". A lot to choose from and there are more available! Lets select Mountain Peak oval.
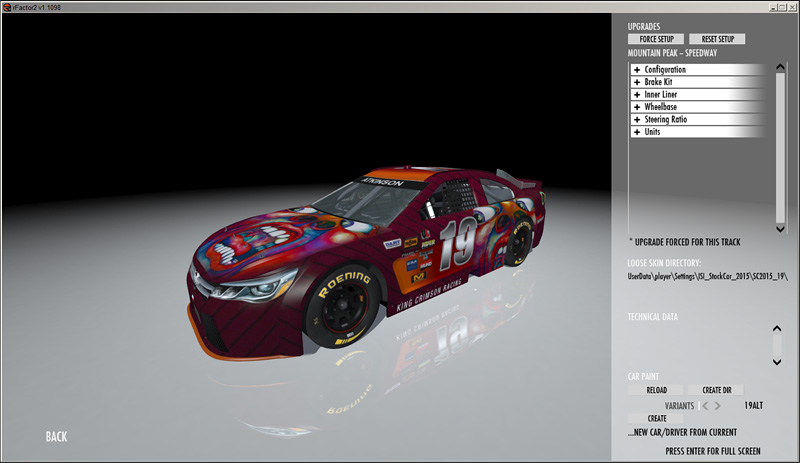
Next, select which car you want. There are three fictitious brands. Centennial (Chevrolet), Edgar (Ford), and Titan (Toyota). You can also use one of our custom templates for the "real" brands when you're ready to do a custom paint job for your car.
Still on cars, click on the "Tuning" text at the bottom of the screen. rFactor StockCar drivers will go nuts in here. Stuff we begged for in rF1!
A word of caution. BE PATIENT! First time a car loads it builds shaders and a bunch of other effects based on your settings. You may see nothing displaying where the car is supposed to be for a few minutes the first time it starts-up. It can take a few minutes depending on your computers heft, so let it run.
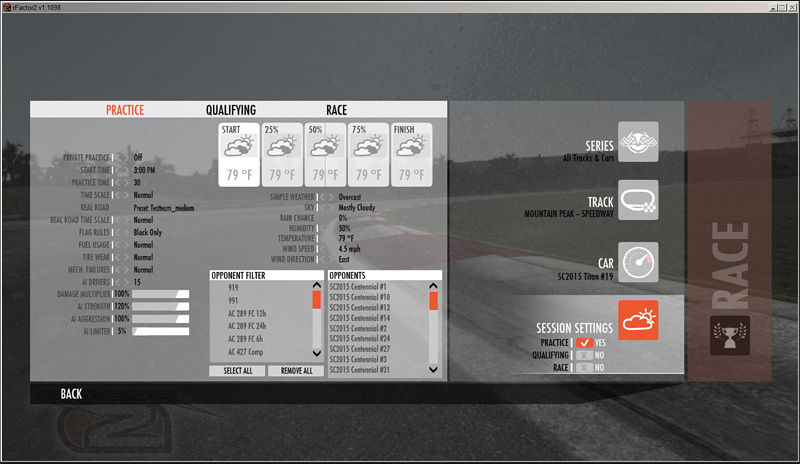
Next screen to look through is the event settings. It is displayed with the cloud and sun icon. In here you will find all the race parameters along with weather and track conditions.
Once done here, click the orange bar on the side with RACE and you'll be taken to the track screen startup. BE PATIENT! First time a track loads it builds shaders and a bunch of other effects based on your settings. The yellow bar can get part of the way across the screen then stop, then start again. It can take a few minutes depending on your computers heft, so let it run.
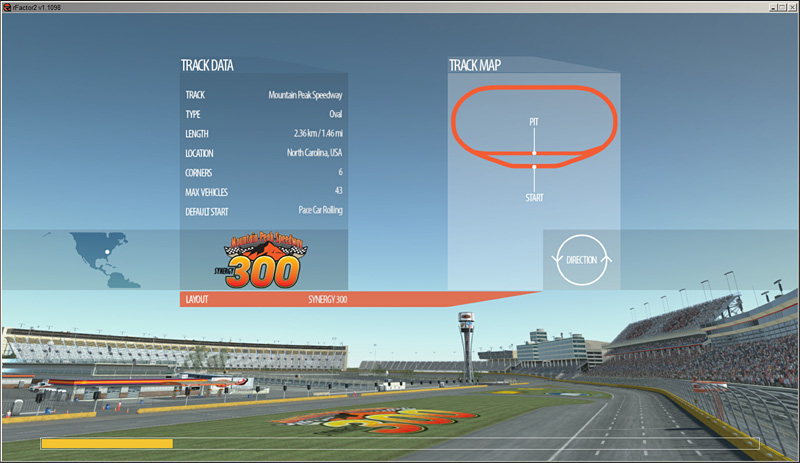
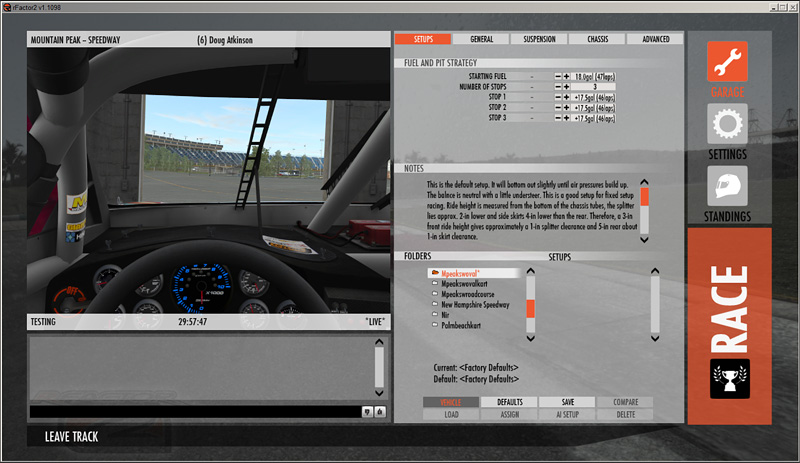
Once the track loading screen has completed, it will take you to this window. Have fun in the "Garage". The next button is a smaller group of settings that duplicate what is available in a previous menu. I would suggest not using the settings in this menu. The "Standings" shows all the cars and their times. This is the same for Single Player and Multiplayer. Once you're ready, click the orange RACE bar and you're on-track!
References
There is much much more to learn, but this page should get you going and on the track. Please take some time and look through our Frequently Asked Questions page here http://stockcarsimracing.com/garage2/index.php?topic=783.0
Have fun and we'll see you at the track!
- SCSR Administration